Showing posts with label Ingredient of the Month. Show all posts

12/08/2009

Chicken Pot Pie

Recipe from Annie's Eats

This is the first recipe using my December Ingredient of the Month: Cream Cheese!! Cream Cheese was used in the pie crust of this recipe.


J has been wanting Chicken Pot Pie for a while now.  I've never made it, nor have I ever made pie crust.  So this was an adventure. :)


The finished product turned out really well!  I decided to make these in 2 (1.5 quart) corningware dishes, instead of individual servings. (I froze one to make another day.)  I swear J would've eaten a whole dish himself if he could have. :)

The pie crust, however, was a huge PITA!!  I made it in the food processor, and it never really came together in a ball.  So I put it in a ziplock bag and tried to form it into a ball that way.  It sort of worked, but as soon as I dumped it on the counter to roll out it fell apart.  I eventually made it work, but it definitely took a lot of effort.  While I think it turned out pretty good, next time I may be going store bought. :p

My changes: I skipped the bell pepper, added a turnip, used fresh carrots and just used about 3-4 lbs chicken breasts instead of a whole chicken.

Ingredients:
Filling:
3 T unsalted butter
1 medium yellow onion, chopped
1 large russet potato, peeled and chopped
8 ou button mushrooms, sliced
1 turnip, peeled and chopped
2 carrots, peeled and sliced
1/2 t crushed red pepper flakes
Salt & pepper, to taste
3-4 lbs cooked chicken breasts, shredded or chopped
1 c frozen peas

Sauce:
8 T unsalted butter
1 c AP flour
2 1/2 c chicken broth
1/2 c heavy cream (optional)
Dash of hot sauce
Salt & pepper, to taste

Pie Crust:
16 T cold unsalted butter
3 c AP flour
10 ou cream cheese, chilled
1 t salt
1/4 t pepper
1 large egg

Directions:
To make the filling - melt the butter in a large skillet (with high sides) over medium heat.  Add the potato and onion to the pan and cook for about 5 minutes.  Add the garlic, carrot, turnip and mushrooms for about 15 minutes more, until tender.

Turn off the heat and mix in the chicken, frozen peas, red pepper and salt and pepper.

While filling cooks, prepare the sauce. Melt the butter over medium heat in a large saucepan. Add the flour and whisk until smooth.  Whisk in the chicken broth and cook until it thickens to the consistency of a cream soup (whisking occasionally).

Mix in the cream, if using, hot sauce and salt & pepper. Pour the sauce over the chicken/veggie mixture and stir to combine. Spoon the mixture into your baking dishes (sprayed with cooking spray).

Preheat the oven to 375.

To make the crust - cut the butter into about 16 pieces and combine it with the flour in your food processor (fitted with the metal blade).   Pulse until crumbly.

Add the cream cheese, salt and pepper.  Continue to pulse until dough forms a ball. (As I mentioned above, this never really happened for me, so I placed it in a ziplock bag and formed it into a ball with my hands.)

Transfer dough to a lightly floured work surface.  Use a floured rolling pin to roll dough to about 1/4" thick.  Cut dough to be about 1 1/2" larger than the diameter of your baking dishes.

Lay the dough rounds on top of the baking dishes.  Beat the egg with a whisk, and brush over the tops of the dough.


Place in the oven and cook for about 20-25 minutes, until golden brown.

12/04/2009

December Ingredient of the Month

It's a new month, and; therefore, time for a new ingredient! 


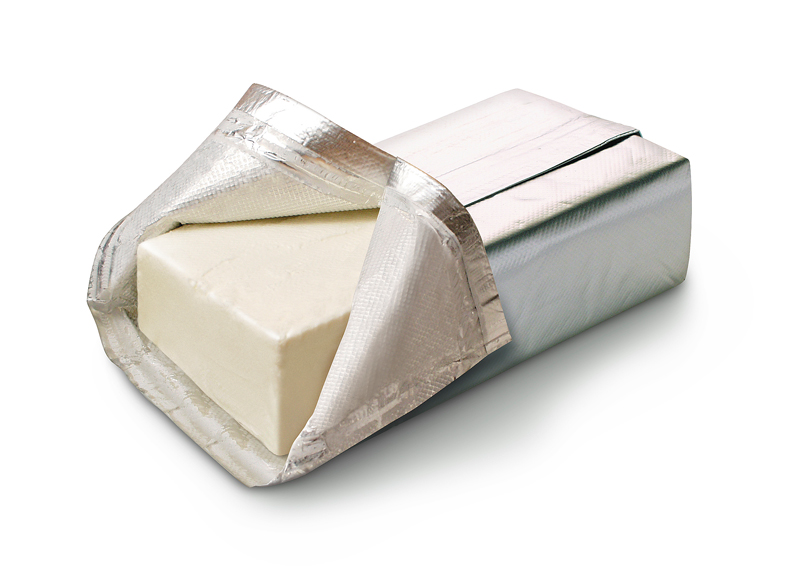
This month I've decided that I am going to feature Cream Cheese!


Photo from foodatarian.com

I absolutely love cream cheese - flavored or plain!  It's a great product that can be used in a sweet or savory dish.  In the past, other than spreading it on bagels, I've used it to make cheesecake, and to stuff chicken breasts!

Here is some information from wikipedia:
Cream cheese is a sweet, soft, mild-tasting white cheese containing at least 33% milkfat.  It is meant to be consumed fresh, so it differs from other soft cheeses such as Brie and Neufchatel.  It is more comparable in taste, texture and production to Boursin and Marscarpone.

There are French references to cream cheese as early as 1651.  According to the American food processing company, Kraft Foods, the first American cream cheese was made in New York by dairyman William Lawrence in 1872. In 1880, 'Philadelphia' was adopted as the brand name, after the city that was, at the time, considered to be the home of top quality food.  'Philadelphia' is now used as some as a generic term for cream cheese, and in Spanish is translated as 'queso Filadelfia' or 'queso crema'.

Cream cheese is typically used as a spread for bagels, crackers, bread or vegetables, and also is often used in cheesecakes or salads.  It can be used to make cheese sauces, and is often used in place of or alongside butter. It makes delicious icing, and is the main ingredient in crab rangoon.

11/30/2009

Maple Roasted Butternut Squash

Recipe from $5 Dinners 

This is recipe #4 featuring my Ingredient of the Month: Maple Syrup!


I love Maple Syrup!  And I've really enjoyed implementing it into different dinner recipes.  This one was no exception!


This was such an easy side dish to throw together.  And I loved the maple flavor with the butternut squash - as did J.  This recipe is definitely a keeper! :)

Ingredients:
1 2-3 lb butternut squash, peeled, seeded and cubed
1 T EVOO
1/4 c Pure Maple Syrup
Pinch of cinnamon, allspice and nutmeg

Directions:
Preheat oven to 400 degrees.

Toss squash with remaining ingredients and place in a single layer on a lightly greased baking sheet.

Cook for about 30-35 minutes, until fork tender.  Mix once or twice as it cooks.

11/23/2009

Maple Glazed Chicken Drumsticks

Recipe from maplegrove.com 

This is the third recipe featuring my Ingredient of the Month: Maple!


This chicken was delicious and super easy to make!  I thought it had the perfect sweet/spicy combination.  YUM! :)


Ingredients:
2.5 lbs chicken drumsticks (you can really use any part of the chicken you prefer, bone-in)
4 ou Pure Maple Syrup
5 T chili sauce
1 small onion, chopped
2 T cider vinegar
1 T mustard (I used dijon)
1 t Worcestershire

Directions:
Mix all ingredients except the chicken in a small baking dish.  Add the chicken and toss to coat.  Cover and marinate in refrigerator for at least 4 hours, tossing every so often.

Preheat grill, and cook until done all the way through, basting occasionally (I made a mixture of about 1/2 the marinade, without onions, for basting and it was the perfect amount.)  You can also bake these, if you prefer. 

I served these with baked potatos chips that I seasoned with seasoned salt.

11/11/2009

Maple Spring Chicken

Recipe from buffummaple.com

This is the second recipe featuring my Ingredient of the Month: Maple Syrup!


I absolutely loved this recipe!  This was so delicious and so incredibly easy to make.  I wish I could say it's healthy, but, since it used a stick of butter, that would be a lie. :p

I'm going to tag this as Quick and Easy - because, while it takes an hour to cook, it literally took me about 5 minutes to throw it together. :)


The recipe called for 2.5-3 lbs chicken pieces, or equivalent chicken breasts, but I used boneless, skinless chicken thighs that I had in my freezer.  I think the more flavorful dark meat worked really well with the maple flavor. Also - I didn't have any almonds, so I substituted pine nuts - which I think worked quite well.

I had also planned to add some carrots to the recipe, but I apparently used them all in my Tangy Slow Cooker Pork the other day.  But I think they'd be a really great addition. 

Serve this over brown rice - it's delicious!!

Ingredients:
2.5-3 lbs chicken (whole chicken (cut up), breasts or thighs)
1/2 t lemon zest
2 t lemon juice
Dash of pepper
1/2 c (one stick) butter, melted
1/2 c pure Maple Syrup
1/2 t salt (optional)
1/4 c chopped almonds (I didn't have any, so I used pine nuts)

Directions:
Preheat oven to 400 degrees.

Lightly grease a 9x13 baking dish and place the chicken evenly throughout the dish.

Mix the remaining ingredients and pour evenly over the chicken.  Cook for 50-60 minutes, until chicken is cooked through - basting occasionaly.

Serve over brown rice.

11/06/2009

Chicken w/ Maple Mustard Pan Sauce

Recipe from Apple a Day

This is the first recipe featuring my Ingredient of the Month: Maple Syrup!


This chicken was very good; however, I felt like the flavor could really be stronger.  I think if I made this again, I would brown the chicken and then cook it in the sauce so that it really soaks up the flavors.

But it was a really simple recipe to throw together - great for a weeknight meal!

Ingredients:
2 boneless, skinless chicken breasts
Salt & pepper to taste
2 T olive oil
1 c chicken broth
3 T pure maple syrup
2 T plus 1 t coarse-grained mustard
1/2 t dry mustard
2 t dry parsley (or use fresh at the end for garnish)

Directions:
Heat oil in a pan over medium heat.  Season chicken with salt and pepper and cook through in the pan, about 5 minutes per side (depending on thickness of chicken). (As I said above, next time I would cook it with the sauce in the pan.)

Meanwhile, whisk together the remaining ingredients.

Once the chicken is cooked through, remove it from the pan.  Place the sauce into the pan and bring to a boil for about 5 minutes, until reduced down to about 3/4 of the original amount.  Return chicken to pan and bring up to temp, turning once to coat with sauce.

Serve with some of the pan sauce spooned over top.

Ingredient of the Month: November!


It's a new month, which means it's time for a new ingredient!!  Since I actually used this new ingredient in a meal this week (last night, in fact) I decided it would be perfect for the new month!

So, the new Ingredient of the Month is... Maple Syrup!

Image from frontiersoups.com

I love the sweet, sticky goodness of maple syrup!  And I'm talking pure maple syrup, not the kind made mostly from corn syrup.

Here's some information about Maple Syrup I found on wikipedia.

Maple Syrup is a sweetener made from the sap of some maple trees. In cold climate areas, these trees store sugar in the roots, and the sap which rises in the spring can be tapped and concentrated. Quebec, Canada produces the world's largest supply of maple syrup, and the United States is the only other major producer and the leading consumer.

Uses:
Maple syrup is most often used with pancakes, waffles, french toast, oatmeal, as an ingredient in baking, or as a sweetener for beer.  Though, as you'll see in my first Ingredient of the Month recipe, it can be used in savory recipes as well.

Production:
It takes approximately 10 gallons of sap to be boiled down to make only 1 quart of syrup. One mature sugar maple produces only about 10 gallons of sap in the 4-6 week sugaring season. Trees are not tapped until they have a diameter of 10 inches at chest height, and are at least 40 years old.

Maple Syrup is sometimes boiled down even further to make maple sugar, a hard candy usually sold in pressed blocks, and maple taffy.

Imitation 'Maple Syrup':
In the United States, "Maple Syrup" must be entirely made from maple sap (small amount of substances such as salt may be added.) "Maple-flavored Syrups" contain maple, but also other, cheaper ingredients.  "Pancake, waffle, or table Syrup" is typically made up of high-fructose corn syrup flavored with sotolon, with no genuine maple content. U.S. labeling laws prevent these syrups from having the word 'maple' in their name.

I typically don't do anything more with maple syrup than pour it over my pancakes, waffles and french toast.  And, in that case, it's typically the 'Pancake Syrup', as opposed to actual 'Maple Syrup'.  So I think this month will be interesting as I try to find different recipes to incorporate this ingredient.

Potato Soup with Apples & Brie

Recipe from Mayo Clinic

This is the final Ingredient of the Month post for October featuring Apples! (I know it's November, I'm a bit late getting it posted.) :)


I've had this saved for a couple of months now, and have been very intrigued by it.  J and I both thought this was really good (although he'd prefer I left a few potato chunks in it instead of blending it smooth).


2 things: This was extremely thick after I blended it, and I ended up adding close to 2 more cups of chicken broth at the end.  I also added more salt and some pepper at the end.  However, as I said, we both liked it.  And it was also good the next day as leftovers.  I wouldn't recommend trying to freeze it - I think the texture would be weird when thawed out.

Ingredients:
1 cup chopped yellow onion
1/4 c sliced leeks (whites only)
4 large Granny Smith apples, cored, peeled and quartered
2 c chicken broth (as I said above, I did end up adding about 2 more cups at the end)
1 bay leaf
1/2 t salt (you may want to add more, and some pepper)
1/4 t thyme
3 c fat-free evaporated milk
6 small potatos, peeled and sliced
4 ou brie, cut into small cubes

Directions:
In a large soup pot, spray the bottom with cooking spray and then add the leeks, apples and onions. Saute over medium heat until softened - about 5-7 minutes. Next add the chicken broth, bay leaf, salt and thyme.  Bring to a boil then reduce to a simmer for about 15 minutes. Remove the bay leaf, remove from heat and set aside.

In the meantime, in another pot combine the potatos and evaporated milk.  Cook over medium heat until potatos are tender, 15-20 minutes.  Stir often. (Note: keep an eye on this, it will boil over quickly.  This may be experience speaking. :p )

Pour the potato mixture into the soup pot and stir to mix evenly.

Add the brie, and using your immersion blender, blend until smooth (or desired consistency).  You can also puree it in small batches in your blender or food processor, adding the brie a bit at a time to each batch.

Garnish with thin apple slices if you would prefer.

10/29/2009

Canned Apple Butter

Recipe from Cooking Light

This is recipe number three using my Ingredient of the Month: Apples!  And what a delicious way to use them!


This is a recipe that can either be made overnight in the crockpot, or in a few hours stovetop.  I decided to just go with the stovetop method.


I haven't actually eaten this apple butter except for a quick taste before I canned it.  But it was delicious!  Exactly like I remember it. :)

This recipe uses the flavors of brown sugar, honey, cinnamon, apple cider, cloves and mace.  I decided to use Granny Smith apples.  I didn't change the recipe at all, so check the link above for the full recipe.

Overall the recipe was extremely easy to make.  Peeling the apples was a bit time-consuming, but easy.  The most difficult part was straining it.  I don't have a sieve so I used one of my wire-mesh strainers and pressed it through with a pestle.  My arm definitely hurt after a while, but it got the job done. :)


For canning, I used the website freshpreserving.com.  This is a great canning resource, so I'd recommend taking a look at it, and follow the instructions on this site for canning.  This was my first time canning, but it's so easy!  And I plan to do more in the near future. :)

It's important to remember that you must sterilize the jars and lids, and once you remove the full jars from the water bath - just leave them alone for 12-24 hours. 

Apple butter has to process in the water bath (rolling boil) for 10 minutes. 

There are so many ways you can use apple butter - spread it on muffins, rolls, bagels and bread; serve it over chicken and pork; or mix it in with your oatmeal, yogurt or cottage cheese.

How do you eat your apple butter?

10/22/2009

Cheddar Stuffed Chicken Burgers w/ Sauteed Apples and Mushrooms

Inspired by Joelen's Culinary Adventures

This is my second post for this month's Ingredient of the Month: Apples!  Instead of pairing them with pork as I did the last time, I'm using the flavors of chicken and cheddar.


When I saw these flavors used on Joelen's blog, I had to try them out myself.  I decided to go with Chicken burgers.  I sauteed the apples with a bit of nutmeg and cumin, and also sauteed some onion and mushroom.  And stuffed the burgers with cheddar.  J and I both thought these were delicious!


I really don't know my exact amounts of anything, so use your best judgement. :)

Ingredients:
1/2 lb ground chicken
Nutmeg (about 1/4 t) plus a bit for the apples
Cumin (maybe 1/2 t) plus some for the apples
Approximately 1/4 c Panko bread crumbs
Salt & pepper, to taste
2-3 T shredded cheddar
1/2 apple, cored and thinly sliced
4-5 button mushrooms (or small portobellos), sliced
1/4 small onion, sliced
1 T olive oil, split
Dijon Mustard
Hamburger buns

Directions:
In a medium bowl, mix the ground chicken, nutmeg, cumin, Panko, salt and pepper.

Split the ground chicken mixture into two equal portions. Then split each portion in half.  Form each portion into a patty.  On 2 of the patties, place about 1-1 1/2 T cheddar cheese.  Top with the other 2 patties.  Make sure to seal the patties all the way around, to contain the cheese.

Cook the patties on the grill or in a skillet (I used our cast iron), for about 4-5 minutes per side.  Until cooked completely through with no pink in the middle (about 165 degrees).

Meanwhile - take out 2 medium sized skillets.  Place about 1/2 T olive oil in each skillet and turn to medium heat.  In one skillet toss the apples with the olive oil, then season with cumin and nutmeg. Saute until soft.

In the other skillet saute the mushrooms and onion until tender.

To build the burger, place the burger on the bottom bun, then top with the apples and the mushroom/onion mixture.  Spread dijon mustard over the top bun.  Enjoy!

10/07/2009

Pork Chops with Sauteed Apples

Recipe from Good Housekeeping Step by Step Cookbook

This is the first recipe featuring my Ingredient of the Month: Apples!


I came across this recipe in my Good Housekeeping cookbook and had to try it.  Pork and apples together is such a delicious combination!  I loved this recipe.  The only thing I would do differently, in order to infuse the pork with a bit more apple flavor, is that I would saute the pork in a bit of the apple cider (or juice).  But overall, so good!


I cut this recipe in half, since it was only for DH and I.  It halves very well, but I'll post the whole 4 serving ingredient amounts.

I served this over egg noodles, but you could make it healthier with brown rice, or even skip the starch and pair it with a veggie, or maybe a sweet potato.

Ingredients:
4 t vegetable oil
1 medium red onion, thinly sliced
4 boneless pork loin chops (about 1 1/4" thick)
Salt
1/2 t dried thyme
1/4 t pepper
2 medium Golden Delicious apples, unpeeled, cored and sliced into 1/4" slices
1 T sugar
1/2 c apple juice or cider
1 t corn starch
Pasta or rice (optional)

Directions:
Heat 2 t oil over medium-high heat in large skillet.  Add onions and cook until tender.  Remove onions from skillet and set aside.

Pat chops dry with a paper towel and sprinkle with salt, pepper and thyme.  Place in skillet for about 5 minutes per side, until no longer pink in the middle.  (Here I would suggest adding a bit of cider or juice to infuse the pork with the apple flavor.)


Transfer chops to serving plates and cover to keep warm.

Heat the remaining 2 t oil and add the apples and sugar to the skillet.  Cook apples until lightly browned, then transfer to plates with pork.


In a small bowl mix the cider or juice and cornstarch.  Add it to the skillet with the onions.  Bring to a boil, and then simmer for about 1 minute.

Pour cider/onion mixture over pork and apples.  Serve with pasta or rice if you would like.  I seasoned the pasta with a little bit of thyme, salt and pepper.

10/01/2009

October Ingredient of the Month

I had a great time with my September Ingredient of the Month, Butternut Squash.  For a quick recap, this is what I made: Butternut Squash Fries, Cinnamon Butternut Squash Muffins, Vanilla Butternut Squash Risotto, and Butternut Squash Ravioli w/ Sage Brown Butter Sauce.

4 very different recipes - but all equally delicious. :)


So, for October, I've decided to continue with the Fall theme.  There are so many great ingredients out there to choose from.  But this month, I've decided to focus on... APPLES!!

Photo from travel.latimes.com 

I love apples, and they can be used in so many ways, savory or sweet! Now, as you can probably tell from my blog, I'm not much of a baker, so don't expect to see lots of pies, tarts, cakes and cookies. :)  But, don't worry, I'll get the sweet in there. :)

I've used apples before in my cooking, usually paired with pork or chicken.  I really want to give apple butter a try, and I have a few other ideas up my sleeve.  You'll just have to stay tuned to find out. :)

So - what about apples?

From Wikipedia:
The apple is the pomaceous fruit from the apple tree, one of the most widely cultivated fruit trees.

Interesting Fact: Apples appear in many religious traditions, often as a mystical or forbidden fruit. (We all know the Adam/Eve saga.) One of the problems in identifying apples in religion, mythology or folklore is that the word 'apple' was used as a generic term for all (foreign) fruit, excluding berries but including nuts, up into the 17th century.

For home storage of apples, most varieties can be stored for up to 2 weeks when kept in the coldest part of the refrigerator.  And a few varieties, Fuji and Granny Smith, for example, have an even longer shelf life.

Apples can be canned, juiced and fermented and made into cider or wine.  They are often baked or stewed, and can be dried and eaten or re-constituted for later use.

Research suggest that apples may prevent the risk of colon cancer, prostate cancer and lung cancer. They may also help with heart disease, weight loss and controlling cholesterol, as they have no cholesterol, have fiber, and are bulky for their caloric content.

Check out All About Apples and see how many different varieties there are, and get some information on each. I definitely had no idea there were this many.  Here are a few facts about the more widely known (from bestapples.com and professorshouse.com):

Red Delicious - crunchy with a mildly sweet flavor; great for eating out of hand or in salads
Golden Delicious - mellow and sweet; great for eating out of hand, baking and in salads
Gala - crisp, sweet and snappy; great for snacking and salads; can be a bit bland when baked
Fuji - super-sweet and crisp; excellent for baking and salads
Granny Smith - tart, crisp, juicy and versatile; pie-makers first choice; great for sauces
McIntosh - spicy, aromatic and juicy; good for pie apples and excellent for snacking

Probably enough information for now.  Check back soon for the first recipe!

9/28/2009

Butternut Squash Fries

Recipe from LaaLoosh

I came across this recipe and thought it was another interesting way to use butternut squash - my 4th and final recipe using my Ingredient of the Month!


These were really good!  I just wish I could get them crispier.  It may just come down to keeping them under the broiler for a longer period of time.  I guess they could be dropped in a deep fryer, but I want to keep it healthy! :)


Ingredients:
1 small butternut squash
1 T kosher salt
1 T olive oil

Directions:
Preheat oven to 425.

Peel and seed the squash and then cut it into french fry shapes - try to keep the size consistent as possible.

Drizzle with the olive oil - only enough to just coat, and then sprinkle with the salt.

Place fries in one layer on a baking sheet (coated with a light layer of cooking spray).

Cook for about 40-45 minutes, flipping once halfway through.  If they don't crisp - you may want to try the broiler.  Serve with ketchup - so good!

Cinnamon Butternut Squash Muffins

Recipe from $5 Dinners

Recipe 3 using the Ingredient of the Month: Butternut Squash!! 


My first 2 Butternut Squash recipes were of the savory variety - this one is sweet.  I really like how these turned out!  I saved about 4 of them (wrapped individually in plastic wrap) in a ziplock bag on the counter.  Since after a couple of days muffins tend to get bad if left out, I froze the rest.  Just take one out the night before, and it's ready the next morning to be thrown in the microwave or toaster oven.  Definitely better warm! :)


The cooking technique for the Butternut Squash in this recipe involved roasting it, then using a mixer to mix it into the batter.  No need to puree it beforehand.

Ingredients:
1 banana, mashed
1 c cooked butternut squash (I cubed and peeled mine, tossed with a tiny bit of olive oil, and roasted for about 25 minutes at 400 degrees)
4 eggs
1/3 c applesauce
1/3 c white sugar
6 T canola or vegetable oil
1 t salt
1 t baking soda
2 t baking powder
2 t cinnamon
1 c whole wheat flour
1 c white flour
1 t cinnamon and 1/4 c light brown sugar (optional topping)

Directions:
Preheat oven to 350 and grease muffin tins.

Mix banana, butternut squash, applesauce, sugar, eggs, oil and salt in a large mixing bowl with a hand mixer (or in the bowl of a stand mixer).

In a smaller bowl mix the baking soda and powder, cinnamon and flours.

Pour the dry ingredients into the wet, and mix until a batter forms.

Pour the batter evenly into muffin tins (I ended up with 12 'regular' sized muffins).  If you would like, combine the brown sugar and 1 t cinnamon, then sprinkle it over the muffins.

Bake for about 18 minutes, until a toothpick inserted in the center comes out clean.

I love these warmed with a bit of butter, or drizzled with honey!

9/15/2009

Vanilla Butternut Squash Risotto

Recipe from Giada


This is the second recipe featuring my Ingredient of the Month, Butternut Squash!


This was extremely good - I loved the combination of vanilla and butternut squash.  Instead of roasting and pureeing the squash in this recipe, it's actually boiled in the vegetable broth.

I actually halved this recipe and it was still a bit too much for just J and I.  Below is the full recipe from Giada.

Ingredients:
4 c vegetable broth (I ended up using about 3 1/2 cups for half the recipe, so have more on hand)
1 large vanilla bean
3 c peeled, cubed (1") butternut squash
2 T butter, plus 1 T
3/4 c finely chopped onion (I used shallot)
1 1/2 c arborio rice
1/2 c dry white wine
1/2 c grated Parm
1/2 t salt
2 T freshly chopped chives

Directions:
In a medium saucepan, warm broth over medium high heat.  Cut the vanilla bean in half - scrape the seeds and add them and the bean to the broth.  Once broth comes to a simmer, reduce heat to low and add the squash.

Cook squash for about 5 minutes, until tender. Using a slotted spoon, remove the squash into a bowl and set it aside.

Meanwhile, melt the 2 T butter in a large saute pan.  Add the onions or scallions and saute until tender and transluscent.

Add the rice and stir to coat with butter, and then pour in the wine and simmer until evaporated - about 3 minutes.

Next add about 1/2 c (or 1 ladleful) of broth to the rice.  Simmer until it is almost completed absorbed.  Stir often.  Continuing adding the broth in this manner until mixture is tender but still a bit firm and creamy - about 20 minutes.

Remove from heat and stir in the Parmesan cheese, squash, remaining T of butter and salt.

Serve garnished with chives.

9/10/2009

Butternut Squash Ravioli w/ Brown Butter Sage Sauce

Finally - the first recipe using my ingredient of the month... Butternut Squash!

 
I love this ingredient - it's so versatile and so good!  However, it can be a pain to work with.  The first time I tried to peel and cube a butternut squash - it took me for.ev.er.  But I think I've definitely gotten better with that technique. :) Here are two different peeling and cubing techniques:
My technique is more like the second, but I used a knife instead of a vegetable peeler.  It seemed to work pretty well for me.

Okay - so the recipe. :)  Originally I was going to buy won-ton wrappers to use for the ravioli.  But J and I looked everywhere, and they were no where to be found. :(  So, what was I to do but make the pasta myself?  I would've done this in the first place, but I don't have a pasta roller.

Now - pasta without a pasta roller, not impossible - but it was a time-consuming process!  More on this below.

This ravioli was DELICIOUS!! J was a bit nervous about ravioli filled with squash - but he loved it as well!  Even though it's a time-consuming process, this is something I'd definitely make again.

Ingredients:
Filling:
Recipe from Emeril

1 T butter
3 T minced shallots
1 c roasted butternut squash puree (my squash yielded about 1 1/2 cups, so I upped all ingredients by 50%)
Salt
Pepper (the recipe calls for white, but I don't have it, so I just used my regular black pepper)
3 T heavy cream
3 T grated Parmesan, plus 2 ounces for serving
Pinch nutmeg
Fresh parsley (for garnish at the end)

Directions:
In a large saute pan, over medium heat, melt the butter. Add the shallots and saute for 1 minute.  Add the squash puree and cook until the mixture is slightly dry, about 2-3 minutes.

Season with salt and pepper, and then stir in the cream and cook for 2 more minutes. Remove from heat and stir in the 3 T cheese and nutmeg.  Allow to cool completely before filling ravioli.

Pasta:
Recipe from Alton Brown
3 c AP flour
2 eggs
3 T water
1 t olive oil
1/2 t salt

Directions:
If you click the Alton Brown link above, you'll see directions for doing this by hand, or using your food processor.  If you want to see the food processor directions, see the link above.

On a clean surface make a well with the flour.  In a small bowl whisk together the remaining ingredients.

Slowly pour the wet mixture into the flour and mix with 2 fingers until the wet is incorporated.  Do not force all of the flour into the mixture. (I ended up needed a little more water to help this process.)

If using a pasta machine - shape the dough into a disk, cover with plastic wrap, and refrigerate for 1 hour.

If hand rolling - knead the dough on a floured work surface for 8-10 minutes before wrapping and refrigerating.

Sauce:
Recipe from Emeril
8 T butter
12 fresh sage leaves

Directions:
In a large saute pan, melt the butter.  Mix in the sage leaves and continue to cook until butter has browned.  Make sure you don't burn it!!  Remove from heat.

Assembly:
For hand rolling ravioli, if you're really good I guess you can roll the dough into these nice pasta ribbons that are perfectly formed for making ravioli.  But I'm not really good.  So here's my technique. :)

I took about 1/4 of the dough at a time (keeping the rest on the counter wrapped in a damp paper towel to keep it moist).  I rolled out the dough as thin as I could possibly get it.  This takes a while - but you don't want thick dough for ravioli.

I then took one of my white wine glasses (it has about a 2 1/2" rim on it) and used the wine glass to cut perfect circles out of the dough.  I lined up the circles on the counter and filled half of them with the butternut squash mixture.  I then rimmed the circles with filling with a bit of water.  Then take the other half of the circles and place them on top of the filling, pressing firmly around the rim to make sure the ravioli are completely sealed.  Place completed ravioli to the side underneath damp paper towels.

Make sure to put any extra dough under damp paper towels to keep moist.  Repeat this process with the remaining dough and filling.  This made about 36 raviolis.  I did have extra dough, which I stuck in the freezer for later use.

I also froze some of the ravioli - to do this place them on a baking sheet, cover with plastic wrap, and freeze for about 20 minutes - 1 hour.  Place raviolis in a freezer bag and put back into freezer.  You can cook them from frozen when ready to eat.

To cook ravioli - bring a pot of salted water to a boil.  Boil raviolis for about 2-3 minutes, until they begin to float.  Drain well.

Serve ravioli with the brown butter sauce, garnished with parsley and sprinkled with a bit of Parmesan cheese.

9/01/2009

Ingredient of the Month - September

First of all - thank you to all of you who voted in my poll for the 'of the Month' item.  The overwhelming majority likes the idea of an 'Ingredient of the Month'.

So - here's how it will work.  At the beginning of each month I pick an ingredient - it could be a fruit, veggie, meat, herb, spice... anything!  Throughout the month I'll blog at least 4 recipes (hopefully 1 per week) that use that ingredient.  And I'd love for you to leave a comment with your favorite recipes that use that ingredient as well - either in my announcement post, or in any subsequent recipes posts!

As well as posting recipes, when I announce the ingredient, I'll also post a bit about the ingredient - and I'll learn along with you. :)  I may also post some little tidbits of information in the recipes along the way.  I'm excited for this!  I think it will be fun and interesting.  

If you have any ingredient suggestions, please leave a comment!  I'll definitely try to use them. :) I'd love to try out ingredients that may not be commonly used in most households.  Those things you buy for one recipe, then have no clue what to do with what's left...

Now, without further ado... the September Ingredient of the Month is...

Butternut Squash
 
Image from harmonyhealthcenter.ca

Fall is on it's way, so I decided that Butternut Squash is a great way to bring in the new season.  :)  I cooked with this for the first time over this past year.  There are tons of uses for Butternut Squash, and I'll try to cover some really different ways to prepare it.

So let's learn a bit about it, shall we?

From Wikipedia...
It's a type of winter squash that has a sweet, nutty taste, similar to pumpkin.  When it's ripe, it turns deep orange, and becomes sweeter and richer.  It can be roasted, toasted, grilled and pureed.  And used as a substitute for pumpkin.

It's a good source of fiber, vitamin C, manganese, magnesium, potassium and Vitamin A.  The seeds of the squash are edible, though not commonly used.  They are good roasted similar to pumpkin seeds.

Storage...
Winter squash keeps well in a cool, dry place.  The key being cool and dry.  However, if you are only using part of a butternut squash, you can keep the rest to use in the future.

To freeze - You can cook it - roast it at 350 until soft - then puree it with a blender (immersion is probably the easiest).  Allow it to fully cool and then place it in a Ziploc bag in the freezer.  From what I've been reading - if you freeze it, future use should involve pureeing it, not using it whole or as chunks.  The consistency won't be right for chunks once it's frozen.

To refrigerate - You can also just wrap any unused squash in plastic wrap, and store it in the refrigerator for about 1 week.

Since I already have my meals planned for this week, I'll have to double up one week in September to get the 4 recipes.  Look for my first recipe next week - possibly Monday!

If you have any questions - leave a comment and I'll do my best to find an answer.  Also, any tips or tricks on the use or storage of butternut squash would also be great.  Thank you!

  © Blogger template 'SimpleBlue' by Ourblogtemplates.com 2008

Back to TOP  

http://www.thenourishinggourmet.com/apeasantsfeast?AFFID=37667